

This post describes in detail how to create a link in a post, page or widget block. You can click on one of the pictures to expand it or view the pictures as a slideshow.
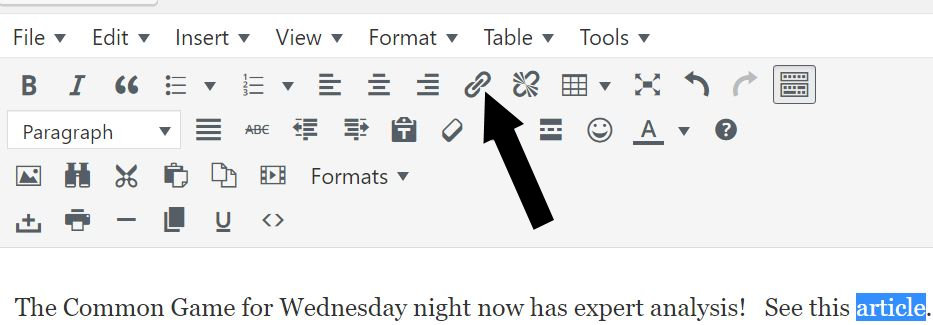
Figure 1: Highlight Link Text
Step 1: Highlight the text you want to see in the link, as in Figure 1. The text is NOT the same as the address the link takes you to, though it can be. Then click the link symbol (indicated by the big arrow in Figure 1).
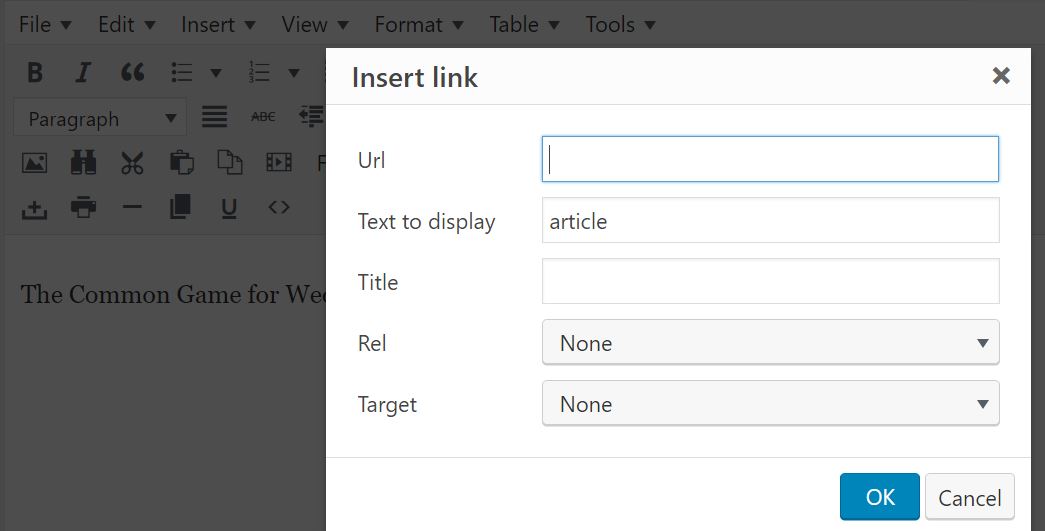
Figure 2: Insert URL
Step 2: Paste or type the desired web address (“URL”) in the corresponding window. If you want a new tab to open when the link is clicked, select “New Window” in the target dropdown. See Figures 2 and 3. Click OK. An easy way to get the URL you want is to open the target item in a separate tab and then to select and copy and paste what you see in the browser’s address window.

Figure 3. Click OK to close Link Pop-Up
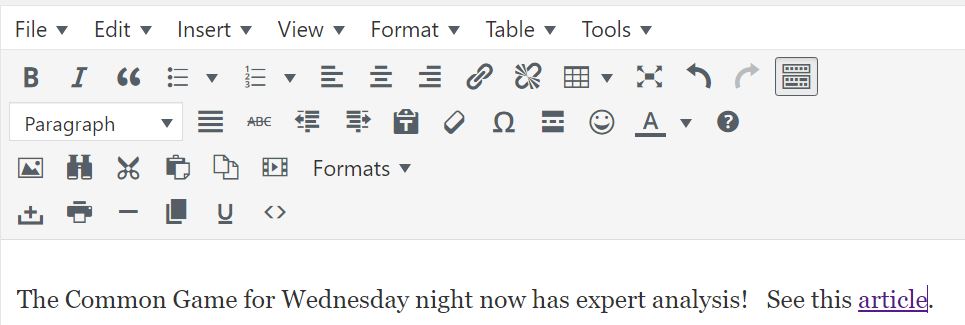
Figure 4. Still in the Editor: Update, Test
Step 3: Note that the link text is now underlined and colored (usually), as in Figure 4, denoting a link. “Update” the post, page or widget block.
Step 4: Open the post or page or widget block in a new tab. Test the link you have created.
Step 5: If the link doesn’t work, reopen the editor and click on the link text. This will open a little tab that lets you correct or delete the link (Figure 5). Click the pencil symbol and make your changes to the URL. Click “apply”. “Update” the post, and then retest as needed.
Note: After you click the pencil symbol, you will see a settings button (gear symbol). You probably should avoid this button if you can, as cleanly closing the resulting pop-up is awkward.

Figure 5. The link needs edited.