

Two forms are provided for uploading content for the bridge website. These forms are generally intended for documents that are unsuitable for the WordPress media library. Posts typically might connect to these documents via links.
For Hand Records: Click the Hands Uploader link in the black footer area of the web pages to open the form. The reason for having a dedicated uploader for hands is that the “/hands” folder is being kept clean so that the customers can see all past hand records in date order without distractions. Hand records are stored in “cedarrapidsbridge/content/hands/”. Hand records should be named as “yymmdd.htm” or else as “yymmdd.pdf”, where yymmdd is the date of play in numeric form. The suffixes must be in lower case. Suffix “htm” is for an ordinary html file and “pdf” is for a pdf file. For example, “170612.htm” would correspond to June 12, 2017 and an html file.
There are two reasons for this strictness in naming hands files. First, the script that displays hands on the Results page uses the name to find the correct file for each date displayed. Second, the naming scheme assists in sorting the files by date when the hands folder is viewed. The Results page refreshes itself every 10 minutes and then re-checks for the existence of uploaded hand-record files. If you have just uploaded a hand record, and you do not see a corresponding link on the results webpage, just refresh the page.
For other documents: Click the Documents Uploader link in the black footer area of the web pages to open the form. This permits you to upload, for example, a pdf file or a txt file that you want to link to in a post. Documents are stored in “cedarrapidsbridge/content/docs/”. The underlying purpose of document uploads is to support presenting the documents in their original form. In most cases the documents are not suited for inclusion within a normal post or page.
For uploading images, you ordinarily should prefer to use the built-in WordPress media capabilities so that WordPress will provide thumbnails and standard sizes. Using the Documents Uploader for images suggests a special reason, such as a special size.
The two forms perform identically except for where they put files. Here is what the Documents Uploader form looks like:
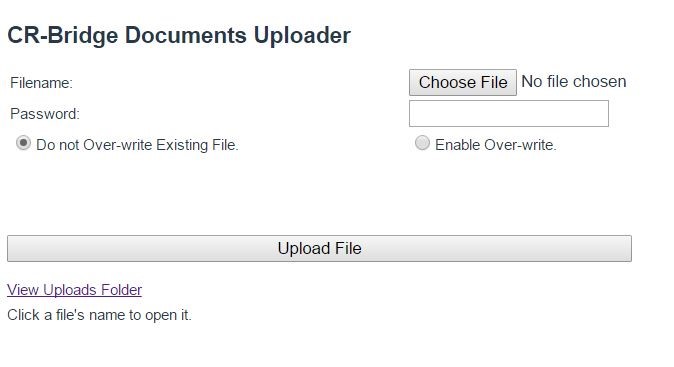
The steps you must follow are:
- Click “Choose File” and locate and select the document you wish to upload from your PC.
- Enter the password (check your email archives).
- If you are intentionally replacing a file someone has uploaded before, click the radar button for “Enable Over-Write.” Otherwise skip this step.
- Click the “Upload File” button.
Scrutinize the messages you receive on the closing page to determine if your upload was successful. The uploader handles a number of popular file types but by no means all. The closing page offers a link to the folder where the documents reside, as well as a link to the document you uploaded. If the uploader rejects a file type you need to upload, contact the admin or use FTP.
You can upload a document name with spaces in it; but the spaces are changed to underlines in the uploaded copy; e.g. “good hand.htm” is changed to “good_hand.htm”. The closing page warns you that this has been done. File names are case-sensitive.
When you replace a document, it is not deleted. It is renamed so that it can still be found. This is to protect content from mistakes. If you are serious about deletions, you can haul out Filezilla or contact the admin. Feel free to upload test documents with silly names, and we will clean up later.